


When a customer is hot to buy, you need to strike quickly. Your newest leads can slip through the cracks if the right sales people aren’t alerted straight away. Instead of watching your pipeline like a hawk, let the magic of Zapier Paths do the work for you. In a few simple steps, you can set up a solution that automatically routes leads using Typeform, Slack, and Gmail.
Zapier is a tool that allows you to connect the apps you use every day to automate tasks and save time. It can collect information from a typeform and send it to any of 1,000+ other apps, like a CRM or an email marketing tool. If you’re a newcomer to Zapier, you can learn about the basics in this article on our Help Center.

Zapier’s new Paths tool allows you to create conditional workflows, meaning that the info you collect in a typeform will take different routes based on simple rules you set. Think of Paths as if/then logic: if “A” happens in your typeform, then do this, but if “B” happens, do something else—and so on. Paths are a great way to build powerful Zaps (Zapier’s word for workflows). No need to duplicate your workflows or write a line of code—one single Zap manages all the outcomes you can think of.
What you’ll need:
- A Typeform account
- A Zapier account (Professional plan or higher, two-week free trial available)
- A Slack account
- A Gmail account
How to use Paths to segment your leads and send to the right sales person
Here we’ll show you how to use Paths to send a Slack message to a particular channel depending on the type of lead captured in your lead generation typeform. For example, if a person wants art direction, the lead will get sent to the company’s ‘art_department’ channel in Slack. If they want Website production, it will go to the ‘web_development’ channel. The above video shows you how it works:
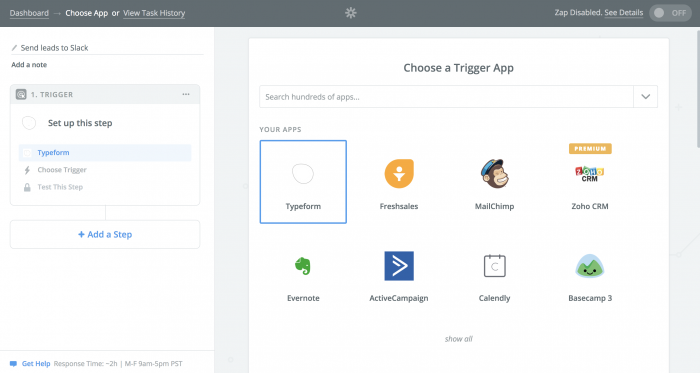
1. Sign into Zapier (or create a free account if you don’t already have one). Click the Make a Zap! button to get started. Name your Zap Send leads to Slack (or similar). Search for Typeform as the trigger app, and select it from the search results.
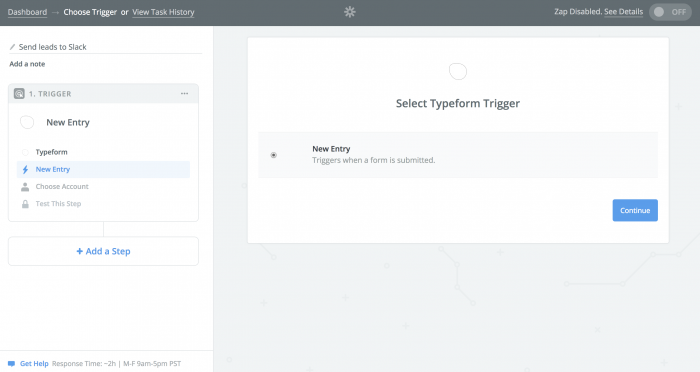
2. By default, Zapier will trigger the Zap when a new typeform is submitted. So, just click Save + Continue here.
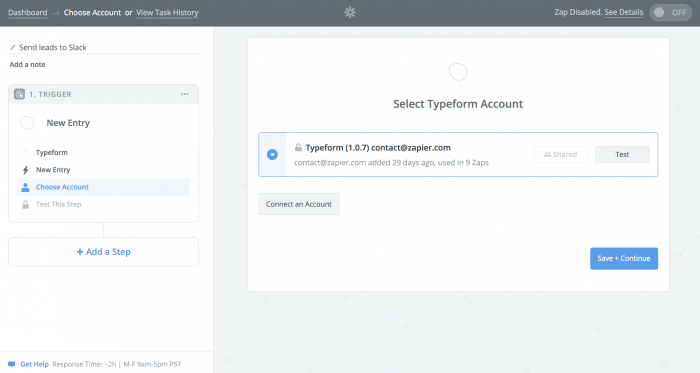
3. Connect your Typeform account when prompted, following the on-screen instructions. You’ll need to enter your API key (you’ll find this in the My Account section of Typeform).
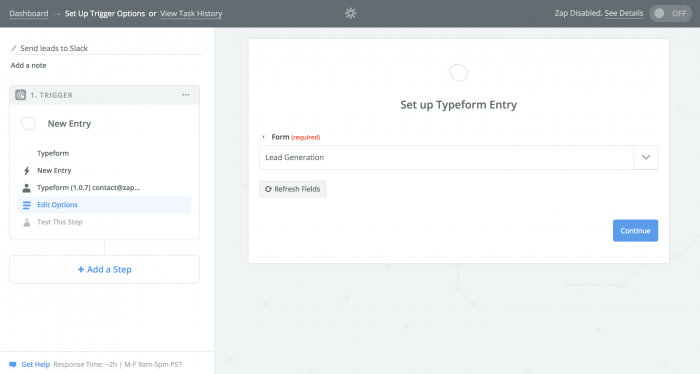
4. On the Set up Typeform Entry screen, select your Lead Generation typeform from the dropdown options. Zapier will prompt you to test the connection with this typeform, so follow the steps on screen and press Continue.
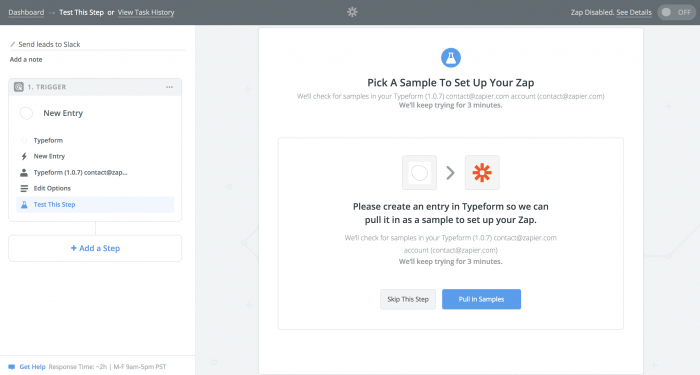
5. The next screen encourages you to pick a sample to set up your Zap. We recommend doing this. Make sure you have at least one entry in your Lead Generation typeform—that means going to the typeform and filling it out. Then click Pull in samples. This will make it easier later to see what information is being sent to Slack through Zapier.
6. Now click Add a Step and select Path.
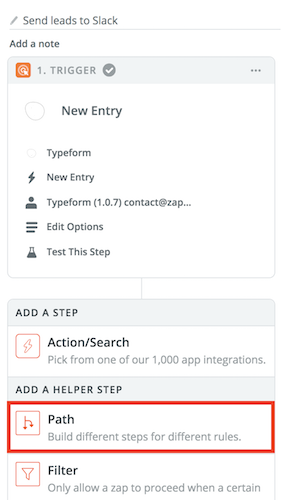
7. Since in this example, we’re sending leads to different Slack channels depending on the department, we need to add a Path that watches for each option and routes requests to Slack accordingly.

To do this, Select Path A. This will be the path for anyone who selects Art Direction, so you can name it Art Direction. Click Continue.
8. Now you’ll set up the rules for this first Path. Using the dropdown options, select the appropriate question (in this case, “How can we help you?”), then choose (Text) Exactly matches, and finally type Art Direction.

Once you’ve completed all three dropdowns, click Test & Continue. Depending on the input you provided in your test submission earlier, you’ll either see a message that your Path would have continued or that it would have failed. Either one is fine. Click Continue.
9. Now you’ll set up your Action step. Search for Slack and select it. Then choose Send Channel Message and click Continue. Then follow the steps to connect your Slack account.

10. On the Set up Slack Channel Message screen, you can pipe in answers from the typeform to the Slack message in order to give more context. Select the appropriate channel from the dropdown (in this case, art_department), and then write your message text, using the plus sign to the right of the field to reveal specific data from the typeform.

11. Once you’ve made all your selections, click Continue, follow the instructions to test it, and then click Set up next Path. You’ll be automatically taken to Path B, where you’ll follow the exact same steps, except selecting (Text) Contains and typing “Web“.

12. Once you’ve finished setting up Path B, you can click Finish and follow the rest of the instructions to turn on your Zap.
13. Want to take it a step further? Let’s say you also want to send an email to the VP of Sales or CEO if the answer to ‘What’s your budget’ is greater than 4.

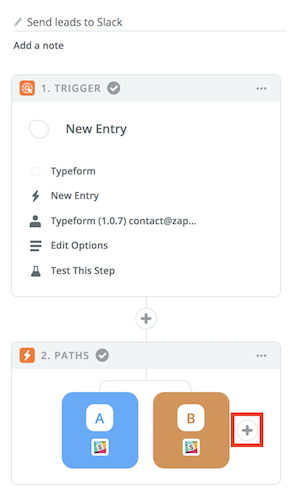
Instead of turning on your Zap after you finish Path B, you can click the plus sign next to your existing Paths and add a third Path.
14. Follow the same steps to set up this Path, this time selecting What’s your budget?, (Number) Greater than, and 4.

15. When you reach the Action step, you’ll select Gmail and choose the Action Send Email.

16. Just like you piped information from your typeform into your Slack message, you’ll do the same for your Gmail email. Input who will receive the email, and under body, type the message, using the dropdown to include specific information from the typeform.

This time, when you click Finish, you’ll turn on your Zap—and you’ll be ready to go.
Get started
Ready to get started? You can dive in with just three steps:
1. Download our Lead Generation template
2. Sign up for a free Zapier account to get started.
3. Check out more information on Zapier’s Paths in this article: “Introducing Zapier Paths: A Smarter Way to Build Conditional Workflows.”
Special thanks to Zapier’s Deborah Tennen and Kim Kadiyala for putting this guide together for our Help Center.